In Part 1, we talked about what a sourdough starter actually is — a living culture of wild yeast and beneficial bacteria that transforms plain flour and water into something extraordinary. If you haven’t read that yet, start there first.
Now it’s time to get your hands involved. Because here’s where most beginner sourdough tutorials go wrong: they hand you a starter and leave you guessing. They tell you to “feed it” without explaining what that actually means for your kitchen, your flour, or your schedule. And then, three days later, your starter smells like nail polish remover and you’re convinced you’ve killed it.
You haven’t killed it. You just didn’t know what to look for. This post will fix that.
We’re going to walk through exactly how to activate a dehydrated starter, how to establish a reliable feeding routine, and — most importantly — how to read your starter so you actually know when it’s ready to bake with. No guesswork. No crossed fingers.
💧 Step One: Activating Your Starter
If you’re starting with the Hankerie Starter Kit, your heritage culture arrives dehydrated — this keeps it shelf-stable, protects the microbial community during shipping, and means it can survive the Australian postal system without a cold pack. But before it can leaven your bread, you need to wake it up.
This process takes 3 to 5 days. Be patient. What you are doing is allowing billions of dormant microorganisms to rehydrate, come back to life, and re-establish their natural balance. Think of it like bringing a plant back from holiday neglect — it needs a few good watering cycles before it truly bounces back.
🔬 What You Need Before You Start
Keep these ready before your first activation feed. Equipment matters more than most beginners expect.
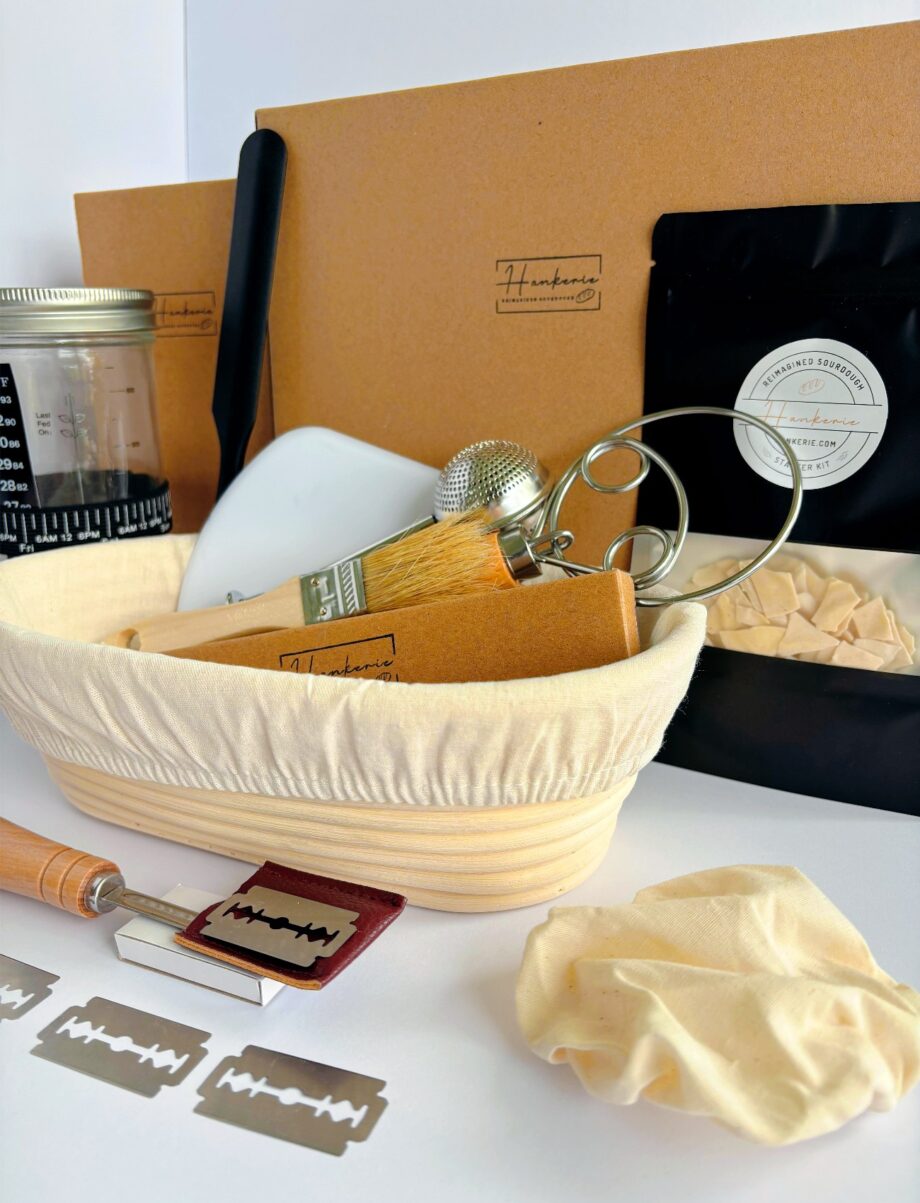
- A clean glass jar — at least 500ml capacity. Glass lets you see the activity. The Hankerie kit includes a purpose-built starter jar with measurement markings.
- Kitchen scales — baking by weight, not volume, is non-negotiable for consistent results. A $15 digital scale changes everything.
- Unbleached flour — plain white or wholemeal. Bleached flour contains additives that inhibit wild yeast. In Australia, Laucke, Allied Mills, and Demeter are all solid choices.
- Filtered or rested water — Sydney tap water is chlorinated. Chlorine suppresses wild yeast activity. Either use a filtered jug, or leave tap water in an open container overnight so the chlorine off-gasses before use.
- A rubber band or marker pen — to mark the starter level on the jar after each feed so you can track the rise.
🌱 The Activation Process: Day by Day
Follow these steps precisely for the first activation cycle. Once your starter is fully active and you’re in a regular feeding rhythm, you’ll develop your own feel for it. But for now, follow the method exactly.
-
1Day 1 — RehydratePlace 15g of your dehydrated starter into your clean glass jar. Add 30g of filtered water (room temperature, not cold) and stir until the dried culture has fully dissolved. It will look like a thin, slightly cloudy liquid. Add 30g of unbleached plain flour and stir until no dry flour remains. The mixture should be the consistency of thick pancake batter. Cover loosely with a cloth or the jar lid slightly ajar — it needs airflow, not a sealed lid. Leave at room temperature for 24 hours.💡 Hankerie tip: Ideal temperature is 22–26°C. In winter, place your jar near (not on) your oven, or inside a turned-off oven with just the light on.
-
2Day 2 — First FeedAfter 24 hours, you may not see much activity yet — and that’s completely normal. Discard all but 30g of your starter (yes, throw the rest away at this stage — this is important to avoid building up too much acidity). Add 60g of filtered water and 60g of flour. Stir vigorously to incorporate air, mark the level on your jar with a rubber band, cover loosely, and leave for another 24 hours.💡 The discard is not waste — it’s biology management. Keeping only a small amount means the fresh flour you add has a bigger impact on the culture’s health and activity.
-
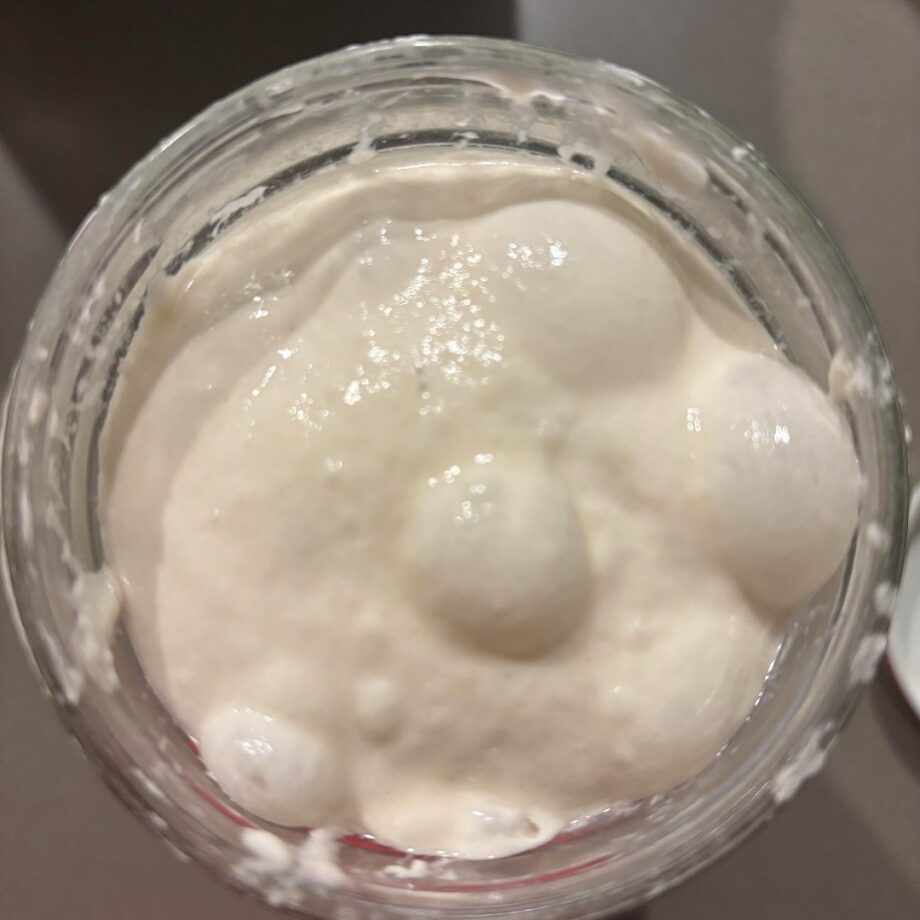
3Days 3 & 4 — Daily FeedsRepeat the same process each day: discard all but 20g, feed with 40g water and 40g flour. By Day 3, you should begin to see small bubbles forming in the mixture and the starter rising above your rubber band mark. By Day 4, the rise should be more pronounced and the aroma will shift from flat or slightly unpleasant to something pleasantly sour and yeasty — like a good craft beer or fresh yoghurt. That smell is your starter coming alive.💡 Bubbles at the edges of the jar and a domed top are positive signs. A dark liquid layer on top (called “hooch”) just means it’s hungry — pour it off and feed immediately.
-
4Day 5 — The Float TestBy Day 5, your starter should be doubling in size within 4 to 6 hours of a feed. To confirm it’s ready to bake with, perform the float test: drop a small teaspoon of starter into a glass of water. If it floats, your starter is active, aerated, and ready. If it sinks, give it one more day of feeding and test again. Do not rush this. An underactive starter produces dense, under-risen bread — and then beginners blame themselves rather than the starter.💡 The float test works because an active starter is full of CO₂ bubbles, making it buoyant. A sinking starter simply hasn’t produced enough gas yet.
🔄 Understanding Your Feeding Ratio
Once your starter is active, you’ll settle into a regular feeding rhythm. The standard ratio at Hankerie — and the one I teach every student — is 1:2:2. That’s 1 part starter to 2 parts water to 2 parts flour by weight.
So if you keep 20g of starter, you feed it 40g of water and 40g of flour. This ratio gives the wild yeast enough fresh food to produce a strong, predictable rise over 6 to 10 hours at room temperature — which is exactly the window you need for baking planning.
📐 Feeding Ratios Explained
Different ratios produce different fermentation speeds. Choose based on your baking schedule, not guesswork.
- 1:1:1 (e.g. 20g:20g:20g) — Fast rise. Ready in 4–6 hours. Use when your kitchen is warm (26°C+) or you need to bake same-day.
- 1:2:2 (e.g. 20g:40g:40g) — Standard ratio. Ready in 6–10 hours at 22–24°C. The everyday go-to for most Sydney home bakers.
- 1:5:5 (e.g. 10g:50g:50g) — Slow rise. Ready in 10–14 hours. Feed before bed, starter peaks in the morning. Ideal for overnight baking schedules.
- Wholemeal flour boost — Replacing 20% of your white flour with wholemeal during feeding accelerates activity. The extra bran feeds the bacteria faster. Useful during Sydney’s cooler winter months.
📖 How to Read Your Starter
This is the skill that separates confident sourdough bakers from frustrated ones. Your starter communicates constantly — through smell, texture, and visual activity. Once you know what you’re looking at, you’ll never second-guess it again.
-
👁The Rise and Fall CurveAfter feeding, a healthy starter rises steadily, reaches a peak (a domed top with visible bubbles throughout), and then begins to fall back down. The peak is your baking window. Use your starter at or just before peak — not after it has collapsed back down, which signals it has exhausted its food supply.
-
👃The Smell TestA healthy, well-fed starter smells pleasantly sour, slightly yeasty, and sometimes faintly fruity — like sourdough bread, naturally. If it smells aggressively of acetone or nail polish remover, it’s over-acidic and hungry. Feed it immediately and increase feeding frequency. A rotten or cheese-like smell often points to contamination — start fresh.
-
🫧The Bubble StructureA healthy active starter shows bubbles throughout the mixture — not just on the surface. When you stir it, you should see a web-like structure of bubbles. This is the gluten network trapping CO₂. Good bubble structure equals a starter that will give your dough proper lift and an open crumb.
-
📏The Volume DoubleThe simplest pass/fail check. Mark your jar after feeding. Your starter should at least double in volume — ideally 2.5 to 3 times — within the expected time window for your feeding ratio. Consistently doubling means a healthy, active culture. Barely rising means it needs more warmth, more frequent feeding, or a switch to wholemeal flour to give the bacteria more to work with.
🌙 Fitting Feeding Into Your Real Life
The most common reason beginners abandon their starter is the belief that it demands daily attention like a household pet. It doesn’t — once it’s fully established. Here’s how to make it fit your actual schedule.
-
1The Fridge is Your Best FriendA fed, active starter stored in the fridge goes dormant. The cold dramatically slows fermentation, and a healthy starter can go 1 to 2 weeks in the fridge between feeds. Before baking day, pull it out the night before, feed it once at room temperature, and by morning it will be ready to use. This is how I manage my own starter around family life and a full teaching schedule.
-
2The Weekly Baker’s ScheduleIf you bake once a week — which is realistic and sustainable for most Sydney households — feed your starter two days before you plan to bake. Day 1: take it out of the fridge, feed it, leave at room temperature. Day 2: feed again. Baking morning: starter should be at peak. This two-feed refresh produces a reliably active culture without daily commitment.
-
3Travelling or Time-Poor?Going away for more than two weeks? Dehydrate your starter. Spread a thin layer on baking paper and let it dry completely at room temperature (24–48 hours). Crumble it and store in an airtight jar. It will last months. This is exactly how the Hankerie heritage starter ships in every kit — proven shelf-stable, ready to wake up again when you return.
Skip the 14-Day Build and Start With a Proven Starter
The Hankerie Complete Beginner’s Sourdough Starter Kit comes with 15g of our 15+ year-old dehydrated heritage “Mother” starter — already through the hard work. Activate it in 3–5 days using exactly the method above, and you’re baking with a culture that has been feeding families across Sydney for over a decade.
✨ What’s Coming in Part 3
Now that your starter is alive, fed, and ready — it’s time to use it. In Part 3, we get into the dough itself: how to mix, stretch-and-fold, and shape your very first sourdough loaf without any fancy equipment. No stand mixer. No couche. Just your hands, a bench, and the method that works every time.
Subscribe to the Hankerie newsletter below so Part 3 lands directly in your inbox the moment it’s published.
📚 The Hankerie Sourdough Series — All 6 Parts
- 01 Why Every Australian Kitchen Needs a Sourdough Starter ✅
- 02 How to Activate & Feed Your Sourdough Starter (The Right Way) — You are here ✅
- 03 Your First Sourdough Loaf: Mixing, Folding & Shaping for Beginners
- 04 Scoring & Baking: How to Get That Golden Crust in a Home Oven
- 05 Sourdough Discard 101: Zero-Waste Recipes That Actually Taste Amazing
- 06 Troubleshooting Your Sourdough: Why It’s Dense, Flat, or Not Rising
Want to learn all of this in person? Join me at the Hankerie Ryde Studio for a hands-on Sourdough Beginner Masterclass — capped at just 5 students for genuine one-on-one coaching. You’ll activate a starter, mix a dough, shape a loaf, and go home with everything you need to keep baking. See upcoming class dates →